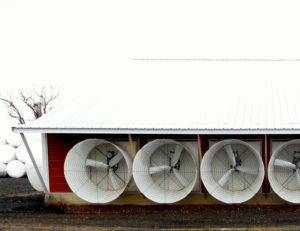
 House tightness should be the first thing on your winter prep checklist. Heat lost through building air leaks causes the heaters to run excessively and waste fuel. Air leaks can also cause cold air drafts that can chill livestock, create cold spots on the floor, and result in poor floor conditions. Houses can be divided into three tightness levels based on their static pressure results:
Very loose houses = 0.05 WC or less
Moderately tight houses = 0.10″ – 0.13″ WC
Very tight houses = 0.20″ WC or greater
Test House Tightness:
- Close the building up and turn on 1 cfm per square foot of floor space. For example: 40’ x 500’ building has 20,000 sq. ft. of floor space, so use 20,000cfm of fan power → (1) 48” fan or (2) 36” fans.
- Measure pressure with a differential pressure gauge. The high-pressure end goes outside the house (usually though an inlet at the front of the house) and the low-pressure end stays inside the house. Hold the gauge firmly against the wall in a level position for the most accurate reading.
- Should get a minimum of 0.1” water column pressure, but 0.2” is ideal.
Identify the air leaks:
While the house is closed up, run fans and smoke test the house to identify where the leaks are. Common locations for air leaks include:
-Around man doors and end wall doors
-Tunnel inlet and side wall curtains
-Perimeter vents and attic vents
-Exhaust fan louvers
-Holes in the ceiling or a poorly insulated ceiling
-The joint between the concrete foundation and the walls
-Loose or severely worn curtains
Fixing air leaks:
Add weather stripping around door openings, vents, and fans.

Patch or replace curtains. Make sure straps are tight to keep curtain against the sidewall in windy conditions.
Patch holes in ceilings and check that insulation is evenly spread.
Check that exhaust fan covers close completely.
Do yourself the favor of checking house tightness every year before heating season ramps up. It’s time consuming, to be sure, but inexpensive and with a great payback.
Subscribe to our blog!
